Science Project Recorded as Time-lapse with Raspberry Pi
One science project we had for school was to observe the influence of light warmness over growth of plants.
The scientific method has six basic steps:
- State the problem
- Gather information about the problem
- Formulate a hypothesis
- Test the hypothesis by experimentation
- Record and analyze the experiment
- State the conclusions
In order to record the experiment, we have decided to create a time-lapse video taking pictures at 5 minutes intervals. This would allow us to compare the growth of plants in the two scenarios, using cold and warm light.
List of materials
- plant tray (with multiple cells)
- soil for plants
- plant seeds
- light source (led light is best, one cold one warm)
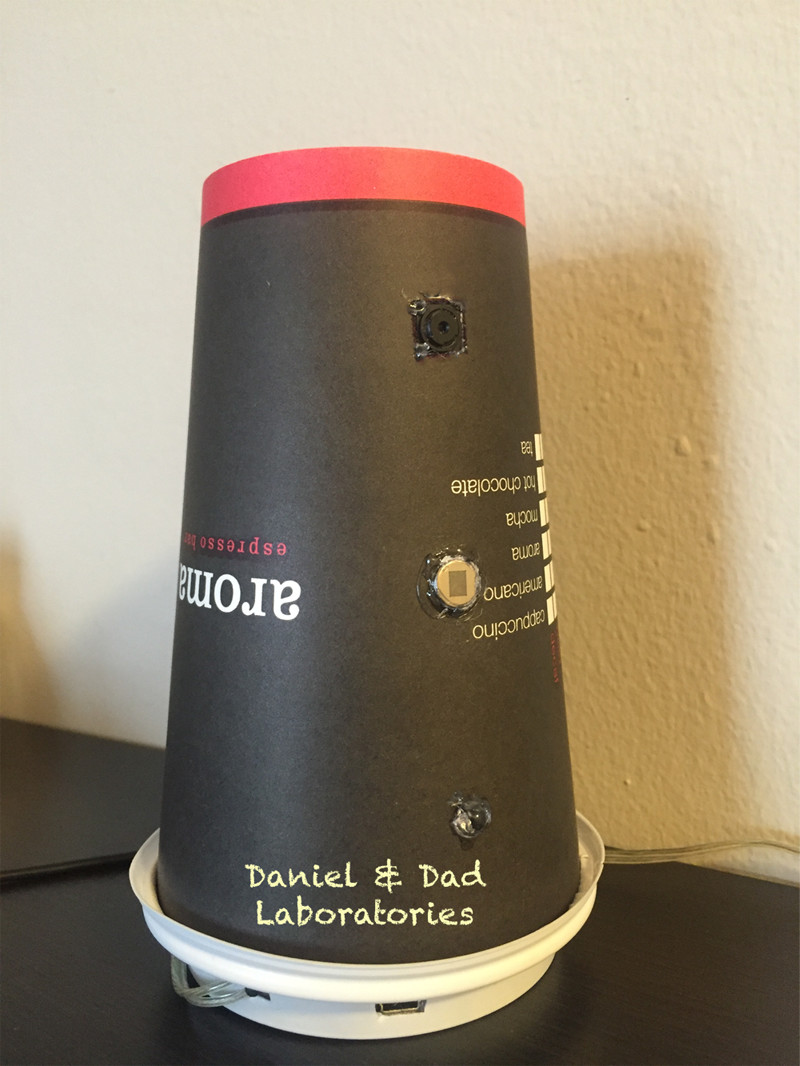
- Raspberry Pi (Raspberry Pi Zero W costs 10$, you can use any model with wifi to avoid network cables)
- Raspberry Pi Camera Module (or you can use an old web cam attached to the usb port)
What is Time-lapse? the photographic technique of taking a sequence of frames at specific intervals to record changes that take place over time. When the photos are assembled in a video and shown at normal speed the action seems faster.
Experiment Setup
The setup for our project looked like this:

Placed each tray on a separate shelf and attached the lights on top of the shelf. Top light warm, bottom light cold.
In order to avoid ambient light interfere with the led light, a cardboard was placed on the side of the shelf.
We have used two Raspberry Pi devices to record each shelf independently. If you have enough space you can place only one camera that can cover both shelfs.
Raspberry Pi Setup
After attaching the camera and configuring the OS on the Raspberry Pi, you are ready to take pictures.
Test that you can run the raspistill command. (see here raspistill documentation)
raspistill -o test.jpgCreate a script to start the raspistill in timelapse mode:
nano timelapse.shCopy paste the following command:
raspistill -o plants-%04d.jpg -tl 300000 -t 1209600000 --rotation 90Note: the above command will take on picture every 5 minutes and a total time of 1.4 days. The rotation parameter was needed to rotate the image at capture time, you can rotate to accommodate your specific setup. (see more details about raspistill timelapse)
Save the script and exit, make the script executable.
chmod a+x timelapse.shRun the script:
nohup ./timelapse.sh &Sample of pictures:

Time-lapse with raspberry pi 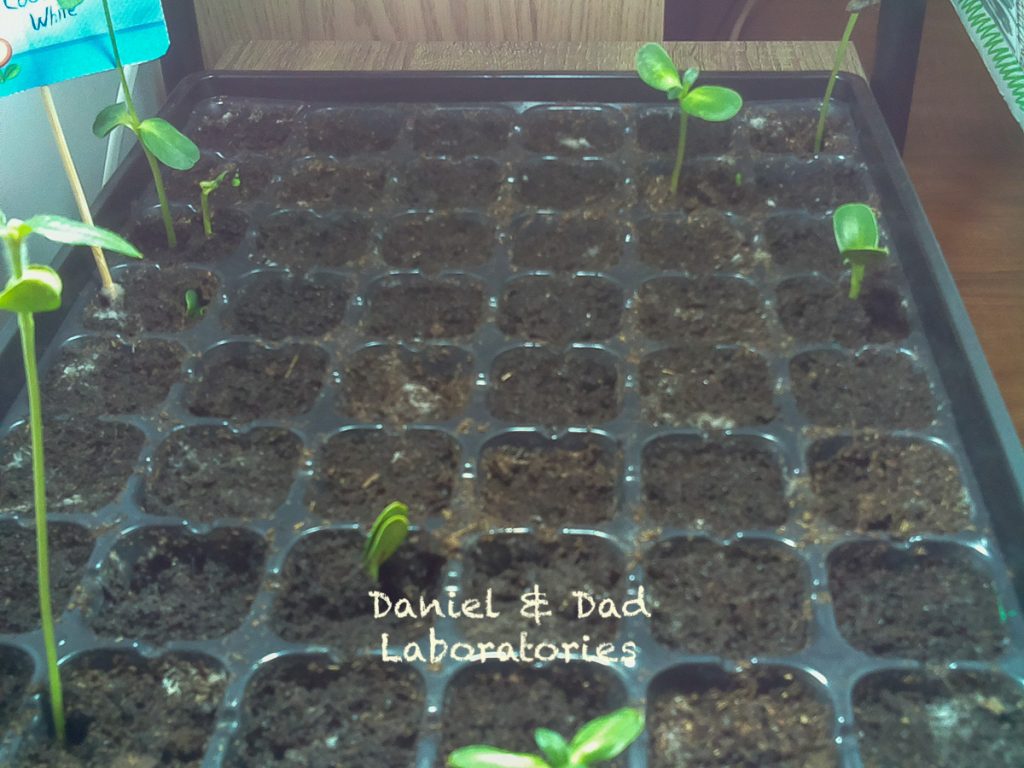
Time-lapse with raspberry pi 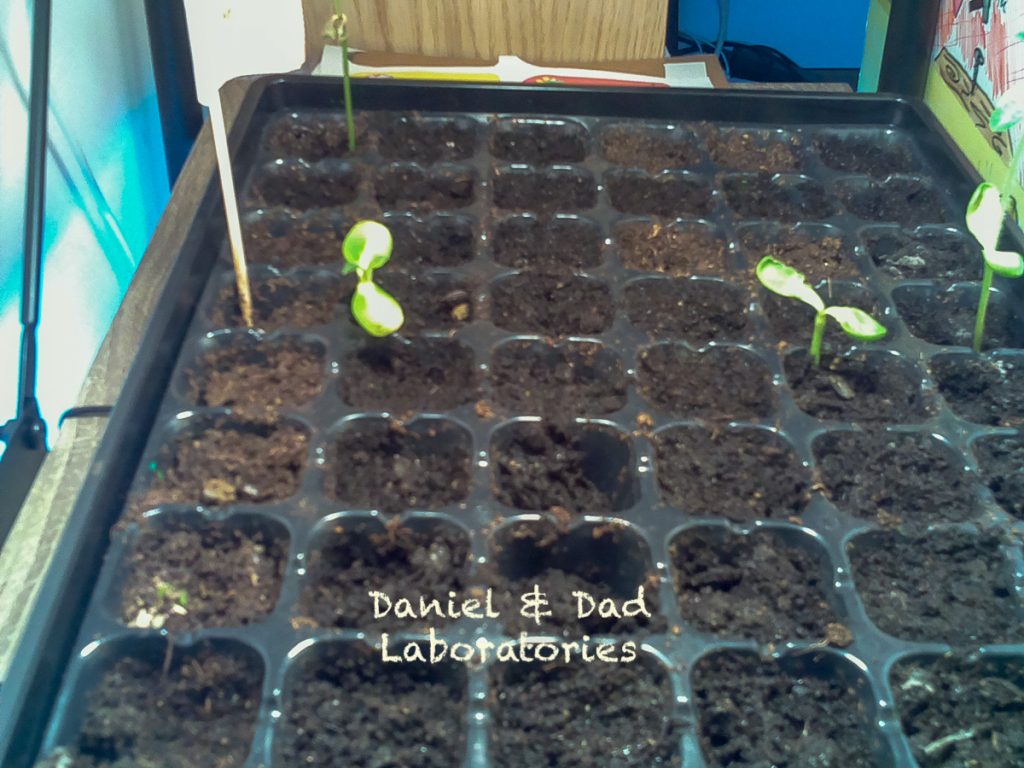
Time-lapse with raspberry pi 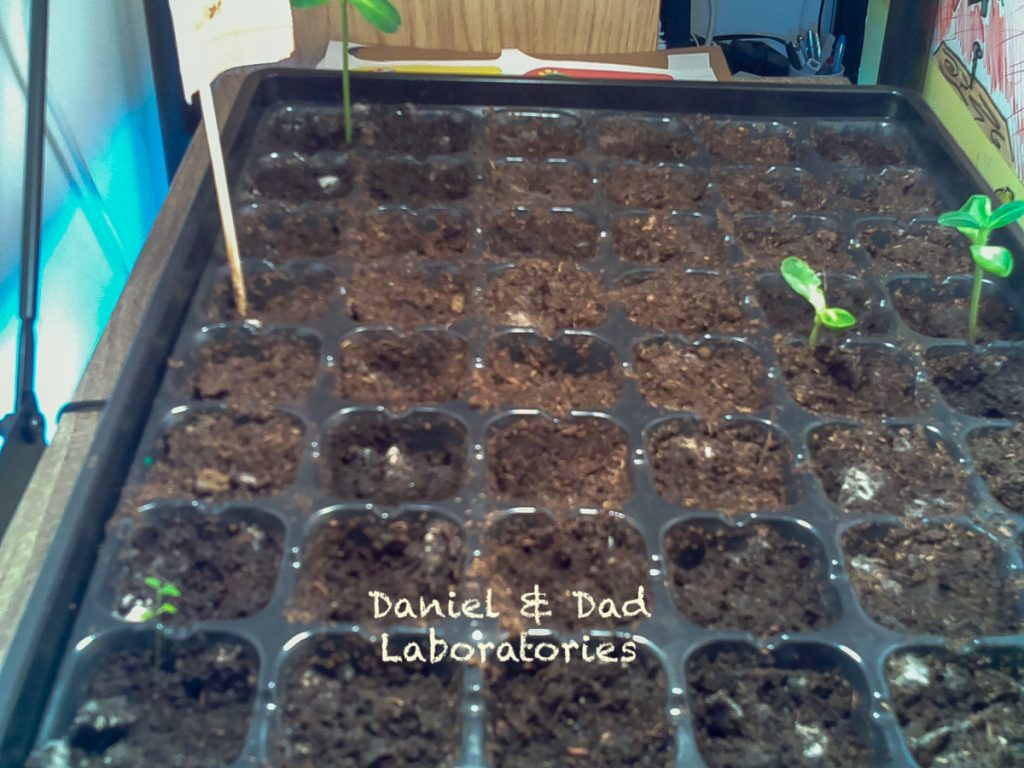
Time-lapse with raspberry pi


Create the video
In this tutorial there are several options to create the video from the pictures.
We have taken a different approach, using iMovie.
In iMovie, import all pictures into project, drag it on the timeline, set the cropping to FIT, select all pictures in timeline and set duration 0.1

Videos from our experiment: