DIY Home Security System using Raspberry Pi
DIY Home Security System – Software Configuration
In this step we will install the OS (Operating System) on the SD card.
Download latest Raspbian OS from Raspberry Pi Download Page
Install Raspian OS on the SD card following the instruction at INSTALLING OPERATING SYSTEM IMAGES
After installing the OS on the SD card, you are ready to start your Raspberry Pi.
Connect the Raspberry Pi to the network router using a network cable.
For the next step you have two options: 1. connect the raspberry pi to a monitor and keyboard or 2. connect to raspberry pi using ssh from another computer (in case 2 you don’t need monitor and keyboard)
Scenario 1 – Connect Raspberry Pi using a TV/Monitor and keyboard
Use a HDMI cable to connect the Raspberry Pi to a TV or to a monitor that supports HDMI. Connect the keyboard to one of the USB ports.
Plug the power cable on the Raspberry Pi (the micro usb connector).
Login with user pi, password raspberry
Continue with “Install Wifi configuration tools”
Scenario 2 – Connect to Raspberry Pi using SSH from another computer
If you don’t have a TV or Monitor that supports HDMI, you can connect directly from another computer using SSH.
First step is to detect what IP was assigned to your Raspberry Pi.
Using a browser connect to your Router [e.g. http://192.168.1.1]. After you login with your router credentials, browse the list of connected devices (each router has a different page for this feature). Because your device is currently connected with a network cable, you should look at that section.
You can also consult he detailed documentation how to detect your Raspberry Pi IP
After you have the Raspberry Pi computer IP, from your machine run ssh to connect remotely. [Note: if you are on a Mac or Linux, the ssh is already installed, on Windows you have to manually install ssh, see documentation how to install ssh on windows]
Run the SSH tool [putty.exe for windows or ssh command in a terminal for Mac] and login with username pi, password raspberry.
Install Wifi configuration tools
run the update for the OS:
sudo apt-get updateinstall a command line tool to configure the WIFI:
sudo apt-get install wicd-cursesrun the wifi tool
sudo wicd-curses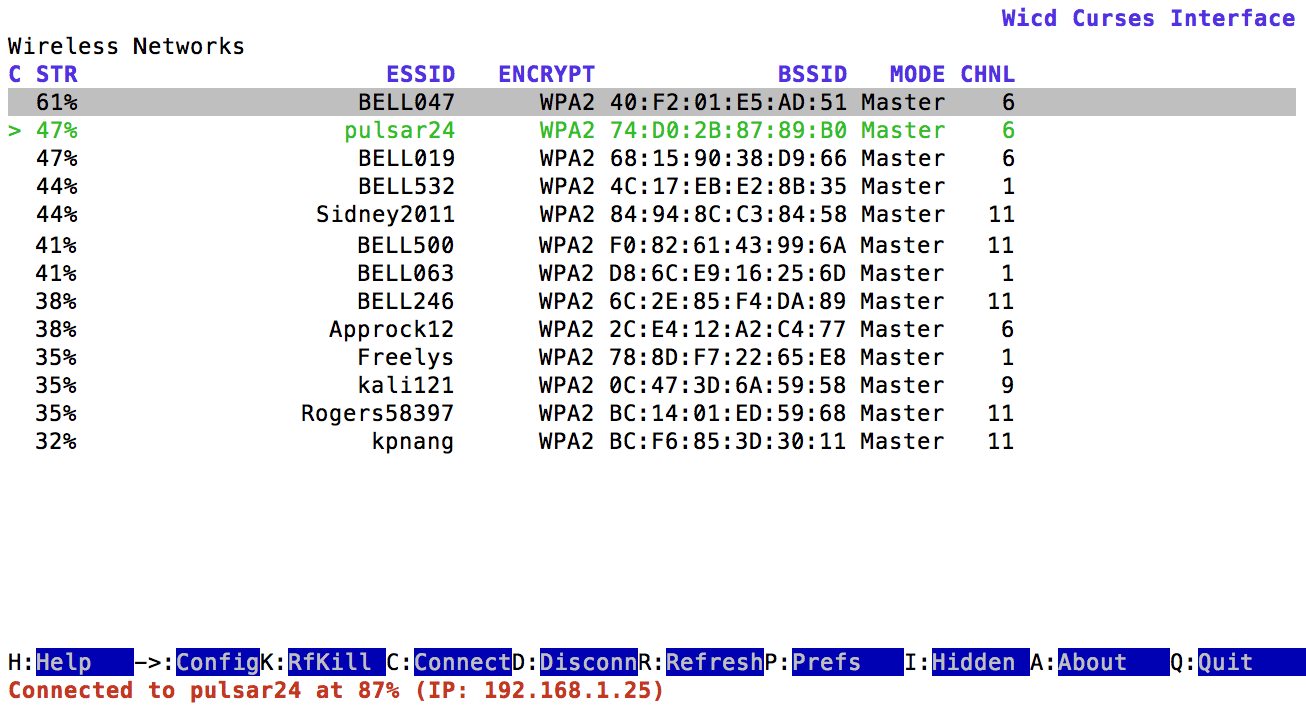
Home Security Device – wifi config tool
Using arrows keys, select your Wifi Network and press right arrow key to edit its properties. Type your wifi password in the Key section. Also check the “Automatically connect to this network” checkbox. Press F10 to save.
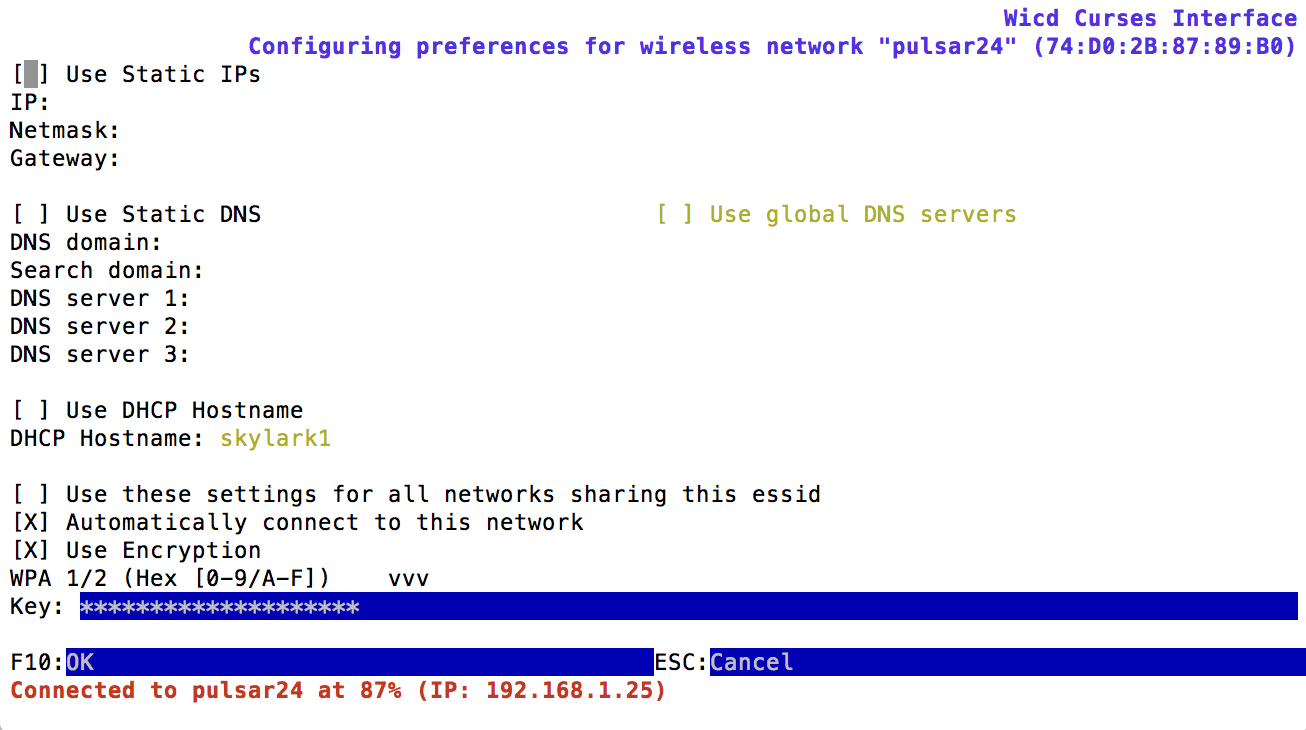
Home Security Device – wifi config
In the first screen (the list of networks) if you connect to the wifi (capital C) then you will be disconnected from the wired connection and the current ssh session. What I suggest is to exit (capital Q) and reboot the Raspberry Pi: “sudo reboot” and disconnect the network cable.
After 2-3 minutes, check again your router to find the new IP of you Raspberry Pi (now a wifi) and connect using SSH to the new ip.
Next Page: DIY Home Security System – Install and configure the door sensors application