Customize Consent Preferences

We use cookies to help you navigate efficiently and perform certain functions. You will find detailed information about all cookies under each consent category below.

The cookies that are categorized as "Necessary" are stored on your browser as they are essential for enabling the basic functionalities of the site. ... 

Always Active

Necessary cookies are required to enable the basic features of this site, such as providing secure log-in or adjusting your consent preferences. These cookies do not store any personally identifiable data.

No cookies to display.

Functional cookies help perform certain functionalities like sharing the content of the website on social media platforms, collecting feedback, and other third-party features.

No cookies to display.

Analytical cookies are used to understand how visitors interact with the website. These cookies help provide information on metrics such as the number of visitors, bounce rate, traffic source, etc.

No cookies to display.

Performance cookies are used to understand and analyze the key performance indexes of the website which helps in delivering a better user experience for the visitors.

No cookies to display.

Advertisement cookies are used to provide visitors with customized advertisements based on the pages you visited previously and to analyze the effectiveness of the ad campaigns.

No cookies to display.

DIY Home Security System using Raspberry Pi

DIY Home Security System – Hardware assembling

In this step we will prepare the hardware at the prototype level. A few wire cutting and soldering is required.  At the end when we have validated the working prototype we will assemble the final product.

Prepare the wires, solder the resistor on one wire (be sure you add the shrink tube before soldering. The long wire connected to the door should be measured to cover the distance from door to the device.

Home Security Device - cut and strip the wires

Home Security Device – cut and strip the wires

Home Security Device - solder wires and resistor

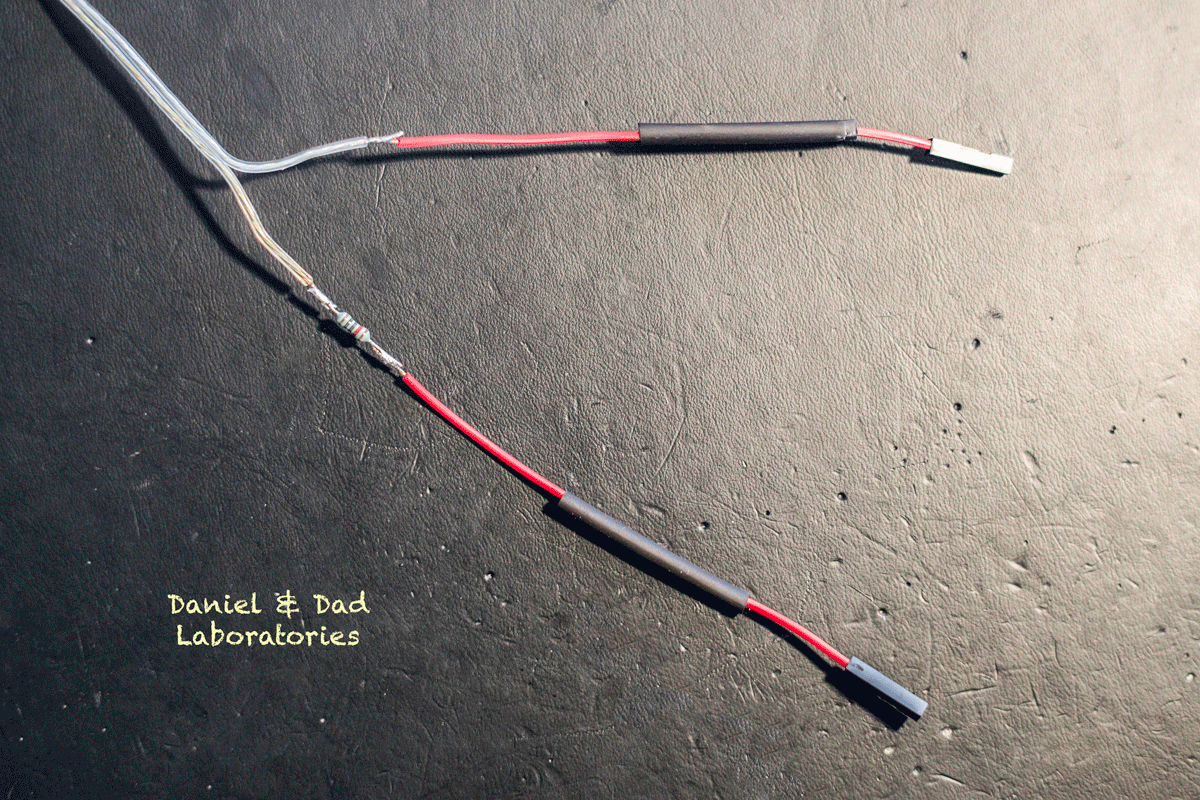
Home Security Device – solder wires and resistor

Home Security Device - heat the shrink pipe

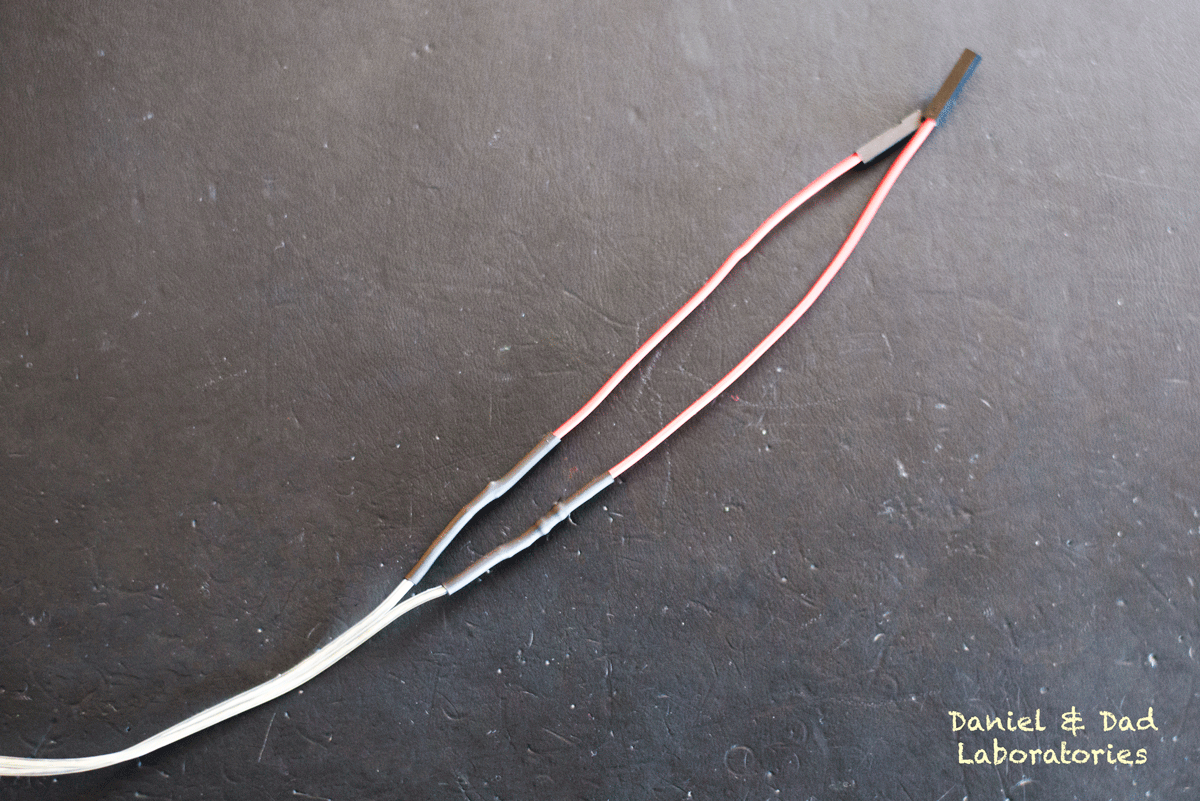
Home Security Device – heat the shrink pipe

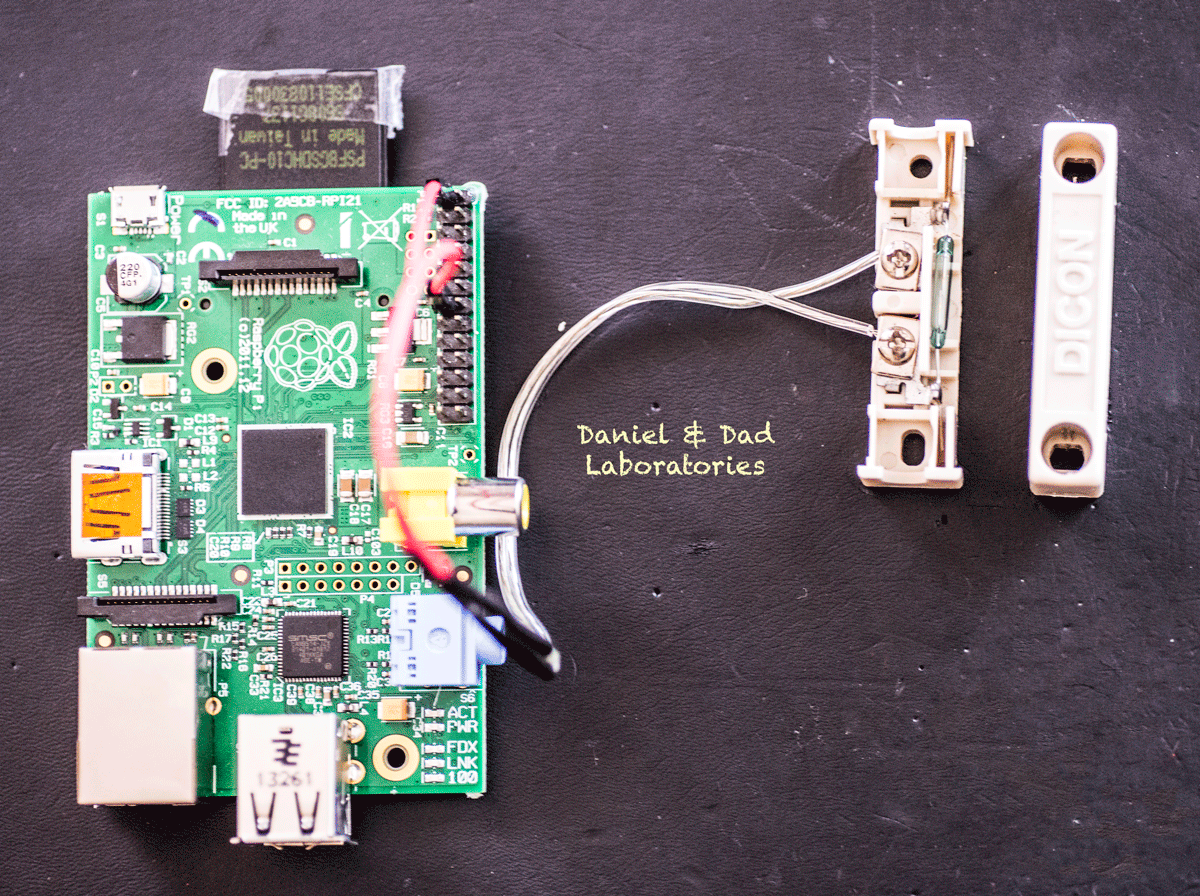
Connect the jumpers to pin 1 and 27. See Raspberry PI GPIO documentation

Home Security Device - connect wire jumpers to GPIO raspberry pi pins

Home Security Device – connect wire jumpers to GPIO raspberry pi pins

Connect the end of long wire to the magnetic sensor using screws.

Home Security Device - connect magnetic sensor

Home Security Device – connect magnetic sensor

Connect the camera following the Raspberry Pi Camera tutorial.

Plug also the WIFI dongle into one of the USB ports.

Home Security System - assembled hardware prototype

Home Security System – assembled hardware prototype


Next Page: Home Security System – Software Configuration

You may also like...

Leave a Reply

Your email address will not be published. Required fields are marked *